Creating cinematic images… Sir Roger Deakins
The talents of cinematographer Sir Roger Deakins CBE BSC/ASC are undeniable. Below we unpack some of the key concepts used to create cinematic images.
Watching many of the movies Roger has lensed it’s easy to forget you are watching a fictional story. The combination of great scriptwriting, set design, acting talent and visionary directors such as Coen brothers, Sam Mendes and Denis Villeneuve when combined help us lose ourselves for ninety minutes or more.
Great filmmaking is about brilliant creative people and their ideas working together. When these things work in harmony, magical things happen on-screen.
But how do we actually light a scene to feel cinematic? Let’s take a look at some of the consistent elements used by many of our favourite image makers.
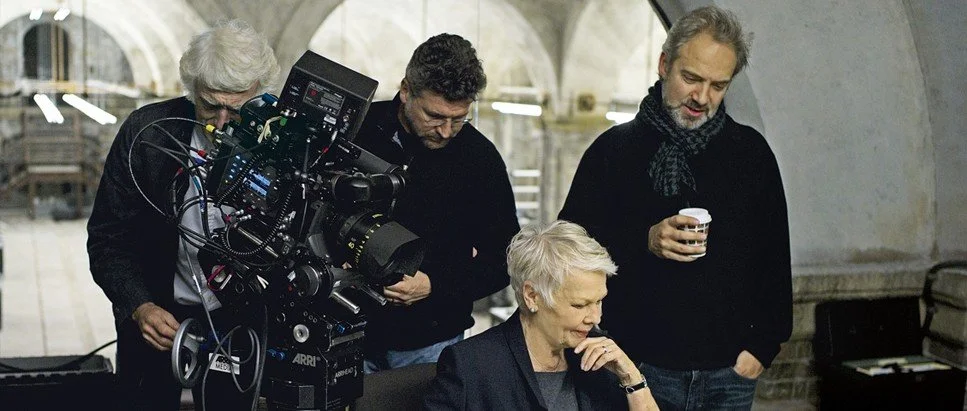
1. Surround yourself with talented, passionate people
Skyfall ©2012 Danjaq, LLC, United Artists Corporation, Columbia Pictures Industries, Inc. All rights reserved.
This may seem a little off topic but it’s the most essential part of creating cinematic images. Having a good team around you enables you to focus on what you do best.
A great team allows you time to think and develop your ideas. They can elevate your work and will help inspire new approaches that will better serve the story.
This is made easier on jobs with bigger budgets but it is still possible to achieve high production values even with smaller budgets. The equipment, crew and level of experience may differ from what you find on a Hollywood style set but the principle remains the same.
Surround yourself with people who care about the details because that’s where the wars are won. Try to build a team of like-minded (not the same) people who are passionate about being creative. It’s that simple.
With that out of the way let’s look at some practical tips to help us all create more cinematic frames.
2. Shoot into the shadows
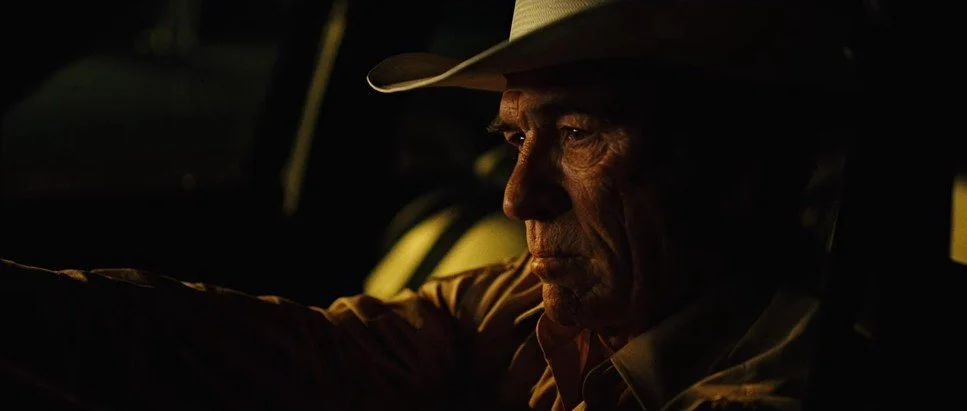
No Country For Old Men © 2007 Paramount Pictures
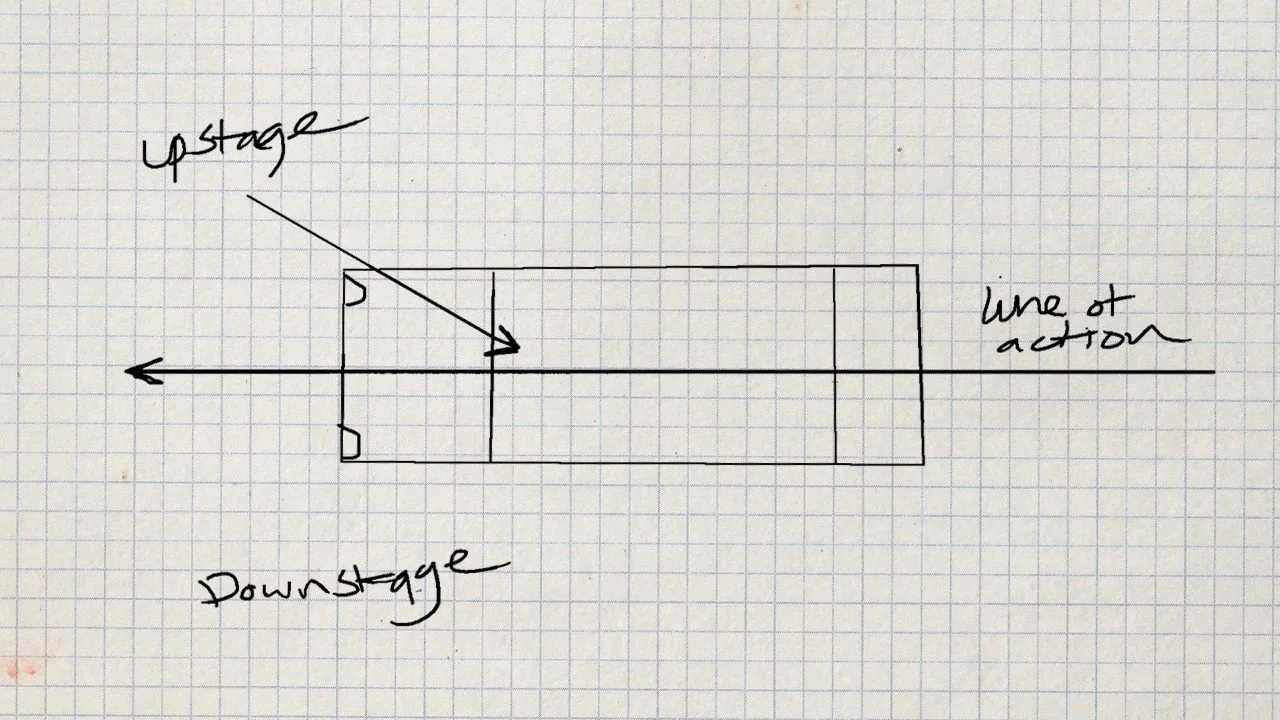
Upstage Key is when you place your main light on the opposite side of the camera. Decide where your action will happen and draw an imaginary line through the middle of the scene. Place the camera on one side and your lighting on the other. This technique will add both shape and depth to your shots.
In the example above, we can see the light is coming from the upper left corner of the frame through the car windscreen. The light hits the seat, bounces up into Tommy Lee Jones face and as an added bonus gives us the all-important eye light. The light is then extended or ‘wrapped’ around to hit the cheek closest to the camera giving us a more three-dimensional image.
Why is this technique so widely used?
The Upstage Key technique not only creates depth but also helps create a ‘salt and pepper’ effect consisting of brighter and darker areas in the frame. This creates contrast and makes our images more interesting. We can use this to our advantage and direct the audience’s gaze around our images by creating pools of light.
One final thought on upstage lighting, it doesn’t always have to be high contrast like the example shown above. The difference between the light and dark areas can be much closer together in lighting values and will still produce a good looking shot. The amount of contrast in your frame should always be guided by the narrative and how you want people to feel when watching your work.
3. Keep it naturalistic
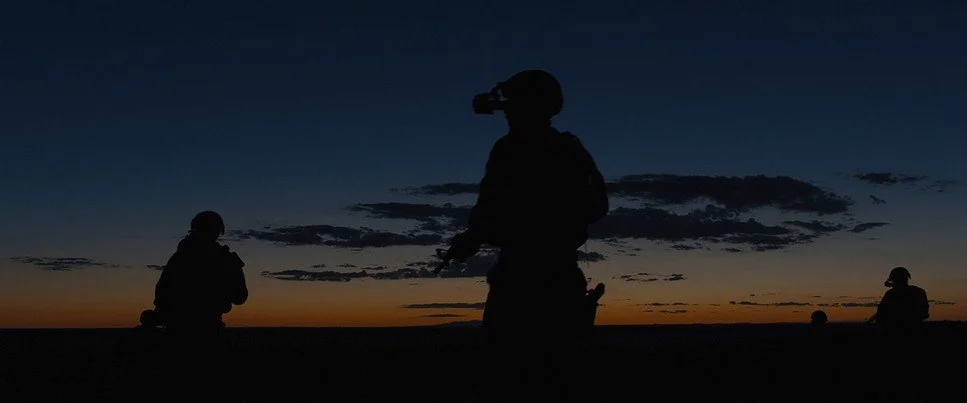
Sicario © 2015 Lionsgate
One thing that sets Roger Deakins work apart is his ability to create a sense of realism. His lighting style is heavily influenced by his time as a documentary cameraman and by a variety of his favourite reportage photographers who only work with available light.
A lifetime of studying natural light and the effect it can have on us has enabled him to create some of the modern cinemas most iconic imagery. The frame above was shot entirely with available light. Using a combination of great scheduling and knowing how far they could push the camera they were able to capture one of the most iconic shots of the movie.
The one common factor when creating naturalistic looks is ‘bounced’ light. Light hitting different surfaces and redirecting onto other surfaces. Only by studying what happens during different times of the day and in different locations can you begin to use it to your advantage.
There is no one rule that fits all when it comes to naturalistic lighting. You will quickly notice the different elements that come into play when you begin to analyse how light reacts in the real world.
Whether it’s a futuristic sci-fi thriller or a period piece, leaning into what occurs naturally and using your skills to amplify the mood will always provide a more believable cinematic scene.
4. Motivate your lighting
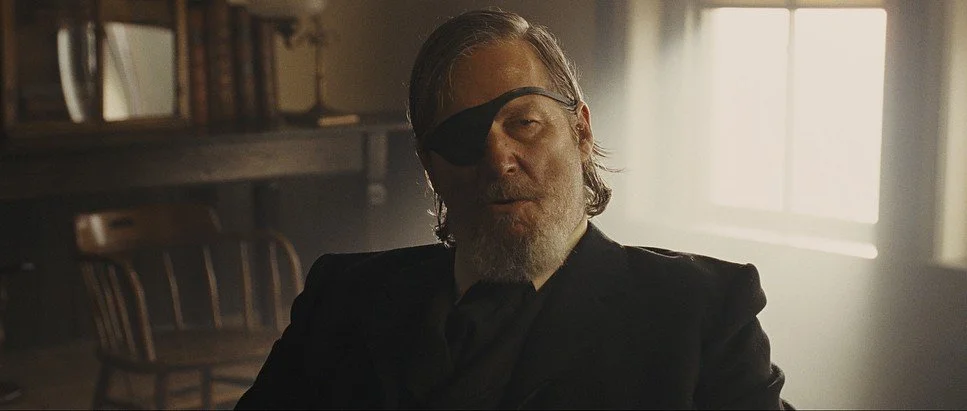
True Grit © 2010 Paramount Pictures
Motivated lighting is one of the most powerful tools in a cinematographers toolbox. But what is it?
Motivated lighting is lighting that extends and or mimics lighting we see in the real world. This could be a fake sun blasting through a window or a practical lamp in the corner of the room and everything in between.
A simple way to create believable lighting is to ask yourself “where is the light coming from?”
Often you’ll need to ‘extend’ a light source further into a space to get the desired exposure for your frame. Referencing the different light sources in your frame you can begin to make more relevant creative decisions about lighting and what’s motivating it.
The shot above is a great example of motivated lighting. We see the blown-out window behind the actor and believe the light through the window is lighting his face. In reality, if this was the only light source in the room then the actor would be lost in a sea of darkness.
What’s actually happening is just off frame right there is a large bounce material (likely to be unbleached muslin) redirecting a light source onto the actor’s face. This gives the illusion of the window light carrying over onto his face and makes the additional lighting feel more believable.
Before rigging any lights, stand back and think about what would be happening naturally. If you can, recce a location and make notes of any existing lighting fixtures you plan to later replace with film lights.
Unmotivated lighting is widely used when shooting commercials or music videos because they are faster cut and you notice lighting changes less.
But in the context of narrative filmmaking, you will want to focus on using motivated lighting, too many moments cheating the light will eventually lift the audience out of the scene and ultimately out of the story.
5. Practice, practice, practice
© Francois Duhamel/Universal Pictures
Obvious but true. Grab a camera, some lights and get out there or in there as the case may be.
On the movie 1917, Roger Deakins and the creative team did extensive testing and rehearsals. Even the great Sir Roger needs prep and that’s because he wants to serve the story. What feels right for the story should always lead your decision making when deciding on the look of your project.
1917 used a combination of no lighting at all and huge complex power-hungry rigs to light the night scenes. This was only made possible by planning ahead and spending time on-location walking through the shots.
We can all practice more than we do, we can all experiment more than we do. If you find yourself stuck try a new technique. Take everything you’ve just read and do the opposite. See what fits your project and which one you prefer.
Our aim should be to create quick lighting references in our head. A kind of framework so when you enter into a project you can hit the ground running.
One final thought for all of us trying to level up as filmmakers.
Contrary to what many YouTuber’s will tell you. You do not need the latest and greatest equipment to be a filmmaker or cinematographer.
Use your phone or any camera you can get your hands on. For lighting use, a standard household lamp, bounce it off some cheap muslin material and start experimenting.
Speak to any professional cinematographer and they will often tell stories of how they have spent a career dialling back the amount of lighting they use. You don’t need all the toys all of the time and rarely do you need them some of the times.
Happy filmmaking!

